
In today’s digital world, protecting your privacy online has become more important than ever. Each time you sign up for a website or app, you’re often required to provide your email address. This can lead to unwanted spam, data breaches, and your personal information being shared with third parties. If you’re an Apple user with an iCloud+ subscription, you have access to a powerful privacy tool that can help you regain control: Apple’s Hide My Email feature.
This innovative Hide My Email setting from Apple allows you to create unique, random email addresses that forward directly to your personal email account. This keeps your real identity hidden while you browse, shop, and sign up for services online. In this guide, we’ll walk you through everything you need to know about using Hide My Email settings to stay anonymous and protect your inbox from unwanted solicitation and potential security threats.
And if you want to protect your inbox even further and keep spam out for good, try Cleanfox — it’s free to download.
Understanding How Hide My Email Works
The Basics of Hide My Email
Apple’s Hide My Email feature is designed to give you control over your online privacy by letting you create unique, random email addresses that act as aliases. Instead of sharing your real email address, you use one of these aliases whenever you sign up for a website, app, or newsletter. Any emails sent to the alias are automatically forwarded to your personal inbox, so you never miss important messages.
If a service starts sending spam or you no longer want to receive emails from it, you can simply delete or deactivate that alias, cutting off communication instantly. This ensures your real email address stays private, and you can manage your digital footprint with ease.
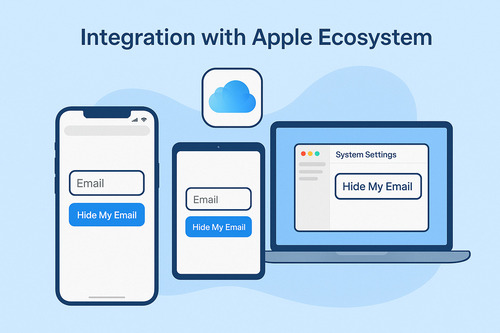
Integration with Apple Ecosystem
Hide My Email is seamlessly integrated across all Apple devices, making it easy to use whether you’re on an iPhone, iPad, or Mac. On your iPhone or iPad, you can generate a Hide My Email address directly in Safari, Mail, or any app that asks for an email address. Just tap the email field, choose Hide My Email, and Apple will create a new alias for you.
On your Mac, the feature works in Safari and Mail, and you can manage your aliases in System Settings. You can also access and manage your Hide My Email addresses through the iCloud website, giving you full control no matter which device you’re using. This integration ensures that your privacy is protected across the Apple ecosystem, from your iPhone and iPad to your Mac and iCloud account.
Setting Up Hide My Email on Apple Devices
On iPhone and iPad
Getting started with Hide My Email on your iPhone or iPad is simple and intuitive. Open the Settings app, tap your name at the top, then select iCloud. Scroll down to the iCloud+ Features section and tap Hide My Email.
Here, you can create a new random email address, view your existing aliases, or deactivate any you no longer need. When filling out forms in Safari, Mail, or supported third-party apps, just tap inside an email field and choose Hide My Email above the keyboard. You’ll be prompted to either create a new address or use an existing one.
You can also add a label or note to help you remember which alias is for which service. This makes it easy to manage your email addresses and keep your real address private.

On Mac
Setting up Hide My Email on your Mac is just as straightforward. Choose Apple menu > System Settings, click your name, then select iCloud.
In the iCloud+ Features section, choose Hide My Email. You’ll see all your active aliases and can create new ones, edit labels, or deactivate addresses as needed.
When using Safari or Mail, simply click inside an email field and select Hide My Email from the pop-up menu. The feature works seamlessly across your Mac, making it easy to protect your inbox while browsing or signing up for services.
Using iCloud.com
If you prefer to manage your Hide My Email addresses from a web browser, you can do so at iCloud.com. Sign in to your Apple Account, go to Account Settings, and select Hide My Email. Here, you can create new aliases, edit labels and notes, or deactivate addresses.
You can also filter your mailbox to see only emails sent to your Hide My Email addresses, making it easy to keep track of your privacy settings. Whether you’re on your iPhone, iPad, Mac, or using iCloud.com, managing your Hide My Email addresses is quick and convenient, giving you full control over your online privacy.
Best Practices for Using Hide My Email

Say goodbye to spam, clutter, and chaos.
Our smart email cleaner filters out junk, organizes your inbox, and helps you focus on what really matters.
✅ Block spam automatically
✅ Organize emails by priority
✅ Keep your inbox clean
✅ Clean old emails you don’t read
📱 Available on the App Store and Google Play.

When to Use a Private Address
Apple’s Hide My Email feature is incredibly useful for keeping your personal inbox free from clutter or protecting your privacy when you’re uncertain about trusting a website or app with your real email address. Use a private address when signing up for newsletters, entering contests, registering for online services, or making purchases through Apple Pay and Wallet. This ensures your email is safeguarded from third-party marketers and reduces the risk of exposure to potential data breaches.
Moreover, when you use Sign in with Apple on supported websites and apps, selecting the Hide My Email option ensures your email remains private. Only the app or website can communicate with the Hide My Email address, which forwards messages securely to your real inbox.
Managing Your Private Email Addresses
Regularly managing your Hide My Email addresses is important for maintaining privacy and control. On your iPhone or iPad, open Settings, tap your name, then iCloud, and select Hide My Email to view all your aliases.
From there, you can label each address to keep track of its purpose, adjust the personal email they forward to, or deactivate any address that’s no longer needed. Deactivating an alias stops emails from being forwarded, effectively blocking unwanted senders.
Management is also available on your Mac via System Settings or through iCloud.com. Make it a habit to periodically review your aliases to deactivate those associated with unwanted emails or expired accounts. This proactive approach minimizes spam and enhances the security and privacy of your inbox.
Conclusion
Apple’s Hide My Email protects your personal email address from unwanted messages. It generates unique, random addresses for apps, websites, and Apple Pay, keeping you anonymous while you control your contacts.
To keep your inbox secure and clutter-free, regularly manage and deactivate unused aliases. You can do this through your iPhone, iPad, Mac, or iCloud settings. Take advantage of this feature today to boost your online privacy and enjoy a cleaner, safer email experience.
FAQ
What is Hide My Email and how does it help protect my privacy?
Hide My Email is an Apple feature that generates unique, random email addresses that forward to your personal inbox. This keeps your real email private and helps prevent spam. It also enhances your privacy by concealing your actual email address and provides the ability to manage or deactivate aliases whenever needed.
How do I create and manage Hide My Email addresses in my iPhone Settings?
To create and manage Hide My Email on your iPhone, open Settings, tap your name, then go to iCloud > Hide My Email. Tap “Create New Address” to generate a random email address. If you need to deactivate or manage an address, simply select it, deactivate it, or change the forwarding email.
You can also copy and use these addresses in other places.
Can I use Hide My Email when sending emails through the Mail app, and how do I reply to messages while keeping my address hidden?
Yes, you can use Hide My Email to send emails through the Mail app on iPhone, iPad, and Mac. When composing a message, select Hide My Email in the From field. When replying to emails sent to a Hide My Email alias, your reply will be sent using the same alias, ensuring your real email address remains hidden.
How many Hide My Email addresses can I create, and what happens if I deactivate an address?
With iCloud+, you can create up to 750 Hide My Email addresses. If you deactivate an address, you have the option to create a new one to replace it. This allows you to efficiently manage your email aliases and remove those you no longer need.
And this was our article on how to Hide My Email Settings. If you want to know more about emails check our blog.