
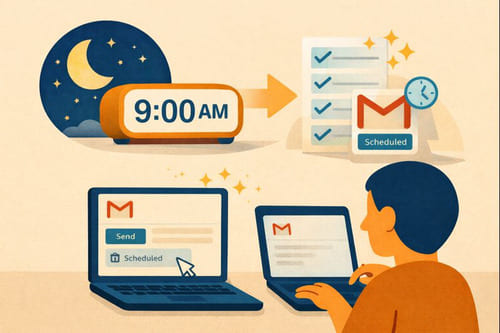
Want to know how to schedule an email in Gmail? The good news is that it’s quick and easy to do—whether you’re using Gmail on desktop or the mobile app. With Gmail’s built-in scheduling feature, you can write your email in advance, choose the exact date and time, and let Gmail send it automatically.
Scheduling emails is especially useful when you’re working outside business hours, managing follow-ups, or communicating across different time zones. In this guide, we’ll show you step by step how to schedule an email in Gmail on both desktop and mobile, so you can send messages at the right time—every time.
And if you want to keep your Gmail inbox 100% clean and free of spam, you can use the Cleanfox platform for free.
Why Schedule an Email in Gmail?
Enhance Time Management
Imagine finishing your emails late at night or during a creative burst of inspiration, then letting Gmail send them at the ideal time. This boosts your productivity by freeing up your day for what truly matters, like tackling tasks without the rush.
Manage Communications Across Time Zones
Collaborating with teams or clients around the globe? Schedule your emails to arrive in their inbox during their local business hours. This avoids awkward middle-of-the-night sends and ensures your message is received when they’re actively checking their mail.

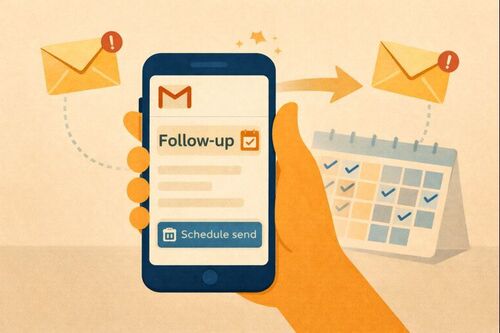
Keep Consistency in Follow-ups
Never miss an opportunity to stay on top of follow-ups. Automatically schedule them to maintain steady and professional communication, whether you’re reminding an unresponsive contact or timing a polite nudge perfectly.
How to Schedule an Email Using Gmail on Your Desktop
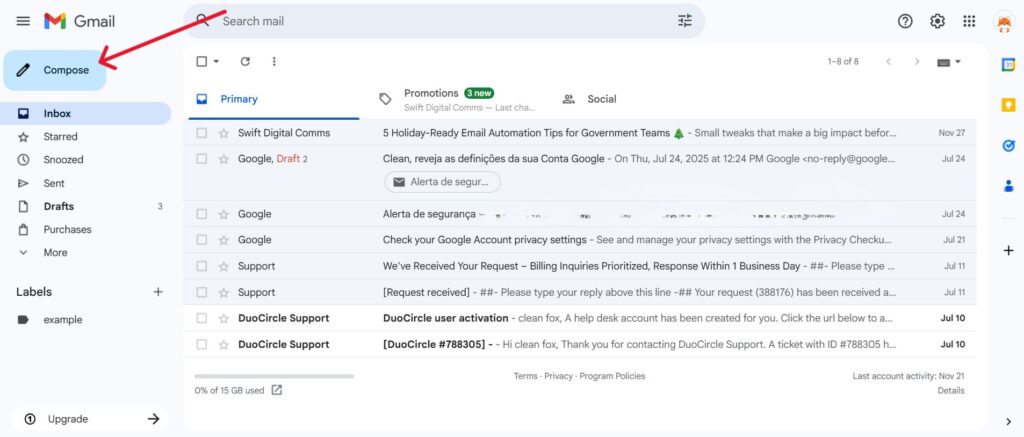
Compose Your Email
Ready to get started, reader? Open Gmail on your computer and click the Compose button in the top-left corner. Add your recipient’s email address, create a punchy subject line, and pour your thoughts into the email body—just like you would with any regular email.
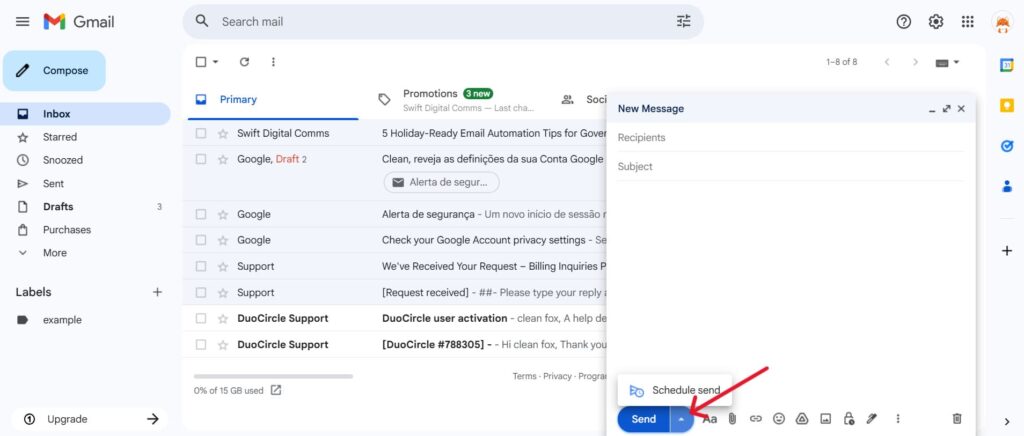
Using the Schedule Send Feature
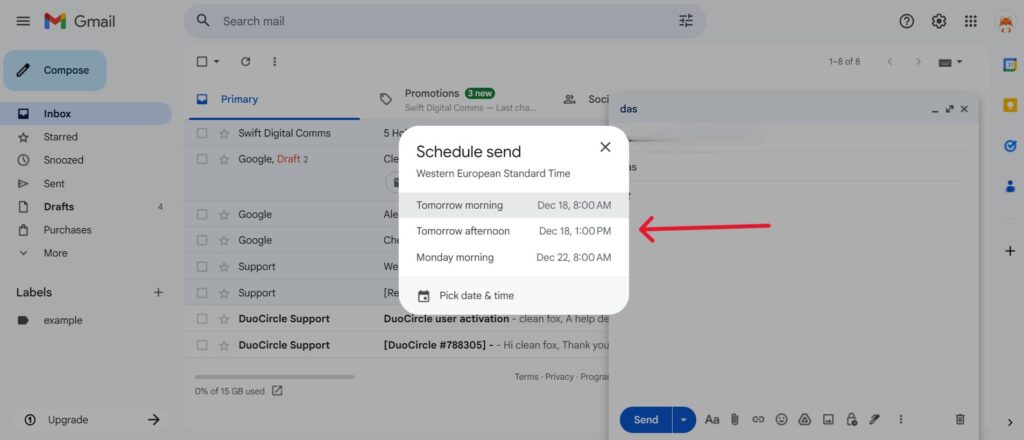
Instead of hitting Send, look for the small down arrow next to it in the bottom-right corner. Click that dropdown menu and select Schedule send. You can choose from convenient presets like “Tomorrow morning” or set a custom time and date. Once you’ve made your selection, confirm by clicking Schedule send—and just like that, your email is queued up for later delivery!
Step.1 👇
Step. 2 👇
Managing Scheduled Emails
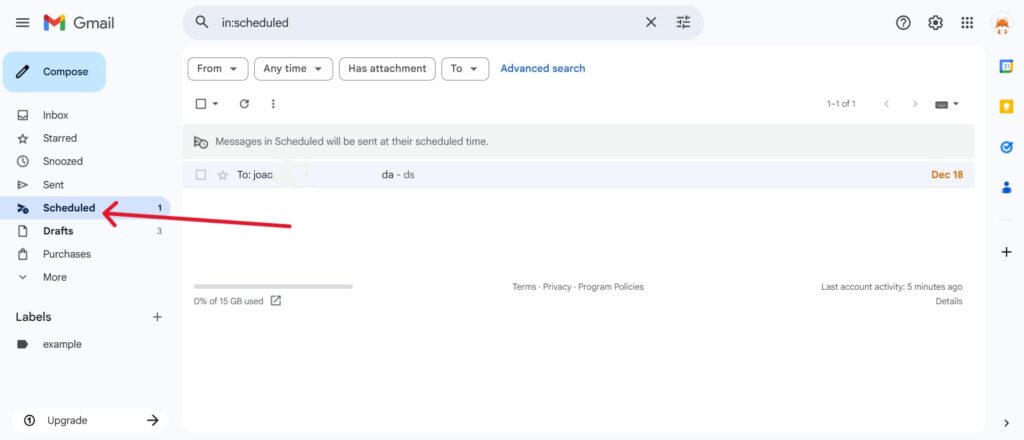
You can find all your scheduled emails in the Scheduled folder, located in the left-hand menu (look for the clock icon). Hover over an email to make changes: click the pencil icon to edit the email, adjust the details, and reschedule it using the arrow next to Send. If plans change and you no longer need the email sent, simply click cancel send using the trash icon.
How to Schedule an Email in the Gmail App on a Mobile Device

Say goodbye to spam, clutter, and chaos.
Our smart email cleaner filters out junk, organizes your inbox, and helps you focus on what really matters.
✅ Block spam automatically
✅ Organize emails by priority
✅ Keep your inbox clean
✅ Clean old emails you don’t read
📱 Available on the App Store and Google Play.

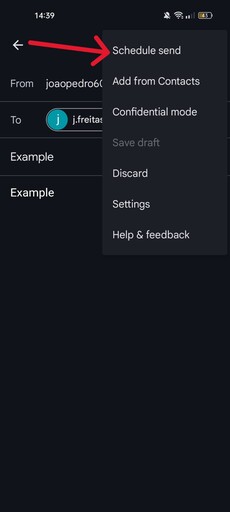
Accessing the Gmail App
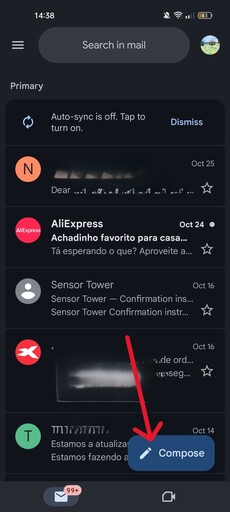
Open the Gmail app on your phone or tablet and tap the Compose button (usually represented by a pencil or plus icon) to start a new email. Ensure you’re signed into the correct account you want to send from before proceeding.
Scheduling the Send
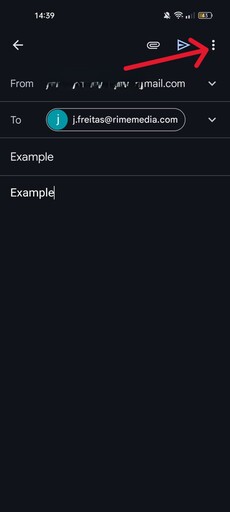
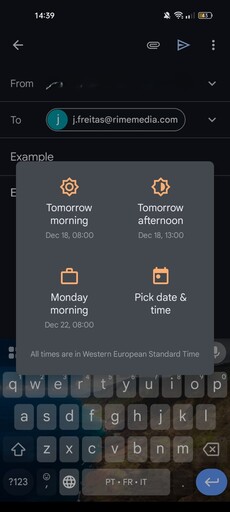
After composing your message and adding recipients, tap the three-dot menu (More) on the compose screen and select Schedule send. Gmail will provide a few suggested options like “Tomorrow morning” or allow you to Pick date & time for a custom send time. Choose your preferred option to queue the email.
If you opt for Pick date & time, use the calendar and time picker to set the exact day and hour. Confirm your choice by tapping the Schedule send button. Gmail will display a brief confirmation that your email is scheduled successfully.
Step. 1 👇
Step. 2 👇
Step. 3 👇
Viewing and Adjusting Scheduled Emails
To view your scheduled emails, open the left-hand menu in the app and tap the Scheduled folder. Here, you’ll find every email set to send later.
Tap on a scheduled email to open it. From there, you can edit the email, select a new scheduled time, or cancel the scheduled send if your plans change. Any changes take effect immediately, and the email will be updated or removed from the Scheduled folder as needed.
Conclusion
Mastering Gmail’s scheduling feature can truly transform the way you handle emails. With the ability to compose messages anytime on your desktop or the Gmail app, you can simply click on “Schedule send” to choose the perfect time for delivery. Managing your scheduled emails is a breeze—just navigate to the left-hand menu where you can easily edit or cancel scheduled emails as needed.
This feature helps you boost productivity, respect different time zones, and improve follow-ups to achieve better responses. Don’t wait—give it a try today and start sending smarter, not harder. Your inbox (and your recipients) will thank you for it!
FAQ
Can I edit or cancel a scheduled email in Gmail after scheduling it?
Yes, you can edit or cancel scheduled emails in Gmail. Simply access the “Scheduled” folder, open the email, and click on Cancel send. After making your edits, you can reschedule it by selecting “Schedule send”. This feature works on both the Gmail app and desktop versions.
How do I schedule an email in the Gmail mobile app?
To schedule an email in the Gmail app, open the app and tap Compose to draft your email. Then, tap the three dots (More) located at the top right corner and select “Schedule send.”
Choose from a preset time or select “Pick date & time” to customize your schedule, then confirm your selection.
What is the limit on the number of emails I can schedule in Gmail?
Gmail allows up to 100 scheduled emails at a time in the Scheduled folder for all accounts. Additionally, the daily sending limits are 500 emails for free Gmail accounts and 2,000 emails for Google Workspace accounts.
Does Gmail support recurring scheduled emails, like weekly sends?
Gmail’s native Schedule Send feature supports one-off scheduled messages, but it does not include built-in support for recurring sends (e.g., weekly). To automate recurring emails, you’ll need to reschedule manually each time or use third-party tools like Right Inbox or Recurring Emails for Gmail.
And this was our article on how to schedule email in gmail. If you want to know more check our blog.